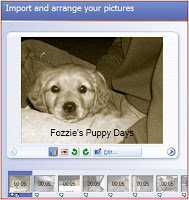
Digital storytelling is a powerful tool to motivate reluctant writers in the classroom. Microsoft Photo Story 3 is a free download that works on Windows XP and Windows Vista and is incredibly easy to use.
How can you use Photo Story to motivate writing in the classroom? Try these ideas:
1. Write about a field trip using your digital pics from your destination
2. Act out reader’s theater scripts or stories, take pictures, and have children write about the plot, conflict, solution, setting, or theme
3. Visually show your classroom routine using Photo Story
4. Visually emphasize new vocabulary
5. Narrate the steps to a science project or math investigation
There is a visual tutorial of Photo Story for those who like to see what they are downloading before they commit to it. I recommend it if you are one who doesn’t like to “play” around on software in order to figure it out.
Basically, there are 6 steps to creating a photo story.
- Open Photo Story and import your pictures using the icon. Select multiple pictures in your folder by using the “shift” or “control” button. Click “upload”.
- You’ll see all of your uploaded photos on a filmstrip bar at the bottom of the screen. Click and drag them to change their order in the story. Click “next”.
- Add text to the pictures by clicking on an individual picture and adding text in the caption box. By clicking on the “effect” button under the individual photo, you can add and effect such as “black and white”. Click “next”.
- Add narration to your story. Using a microphone, click “record” and speak your narration for each slide. When you are done with each slide, click onto the next one and continue speaking. Photo Story will automatically add timings to your photos based on how long you talk. Clicking the “Customize Motion” button under each photo will allow you to choose transitions between photos.
- Add background music. Choose your own music from your files or use music provided to you from the software.
- Save your story.
That’s it! By including a group of photos in a file folder on a shared drive in your school, you can have students access photos easily to create digital storytelling projects. Try and let me know what you think!


No comments:
Post a Comment