Showing posts with label digital storytelling. Show all posts

Sunday, June 7, 2009

Create Stories Online: Digital Storytelling Sites


Myths and Legends Story Creator is a great site for kids who love to create stories. Not only can you create stories with several backgrounds and clip art pieces to choose from, but you can also read and listen to stories that other students have written. Click "Play" to play the story and watch as the stories animate and you can follow along with the narrator. Try making your own and sharing it with friends!


Story Top story creator is an online application similar to Myths and Legends (above) but with fewer choices. The website utilizes a drag and drop interface where you choose backgrounds, characters, and objects. Add text to your story. Choose to save it to the Story Top account or send your story to a friend when you are finished.

Related Posts:
Read, Write, Think: Comic Generator
Audio Books Online
UDL Book Builder

Monday, June 1, 2009

UDL Book Builder


The UDL (Universal Design for Learning) Book Builder is a site where you can read, explore, create, and share digital books that build reading skills for your students. UDL Book Builder also provides three coaches that you can build into your books. (See the 3 little characters at the bottom of the book page?) When you click on a character, the character will speak (and show a text bubble) as it guides the students through different reading skills, such as predicting, clarifying, reading for meaning, etc. In my opinion, this feature alone is what sets this site apart from the rest. I haven't seen any site like this that allows the user to create the book, add images, and add reading coaches! UDL Book Builder provides links to free text, free images, free reading strategies, etc that will help you create your book. You will need to sign up for a free account to fully explore the site, but it's worth it!

Wednesday, December 31, 2008

Audio Books Online

Many special education teachers and reading teachers ask me about sites that have stories online where students can HEAR the book being read to them. While there are several sites that do this, very few of them have the words or captions that go along with the passage. These sites make good learning stations for students in your classroom. Here are some of my favorites:

Storyline Online is a website sponsored by the Screen Actors Guild. There are several celebrities who offer their talents to read a best-loved children’s book on video. Stream the video to watch the actor read the story complete with story book pictures and captions that you can turn on or off. A few of my favorites on this site are: Stellaluna, Knots on a Counting Rope, and The Night I Followed the Dog. This is a GREAT SITE! This site is for elementary school students.

Loudlit.org is a site that boasts “literature for your eyes and ears”, and they’re right. The website features novels, poetry, historical documents, children’s books, and short stories that you can read and follow along as someone reads it to you. You can stream the audio or download it. I especially like the poetry section since it helps students hear how poetry should be read with pauses and breaks. Famous pieces that are featured (and here are just a FEW): The Highwayman, The Raven, The Adventures of Huckleberry Finn, and The Tale of Two Cities. This site primarily targets secondary students, but there are some selections for primary aged kids.

ByGosh.com is a good source for digital text online, although it doesn’t read the text to you. However, many teachers have the use of text-to-speech software that allows them to copy and paste text into the program to read it to the student. This site has items for elementary and secondary students.

At Childtopia, there are seven stories that you can hear read out loud to you. This is definitely geared for elementary school students.
My favorite of these sites used to be Tumble Books - not featured here since they have recently turned their site into a paid site. Previously their content had been completely free. If your school is willing to pay for a subscription, this site would be worth your time and money.

RELATED POSTS:
Read, Write, Think: Comic Generator
Sight Words with Samson
Madlibs online for kids

Monday, December 29, 2008

“Pixie” ideas for the classroom


Every year there is a program that I decide I adore. This year it’s Tech4learning’s Pixie - Check out the software overview by clicking the link. Our county purchased Pixie as part of Tech4learning’s Imagination Suite. We also received Image Blender and Web Blender as part of this package.

What is Pixie?
Pixie is a drawing and painting program that allows children to express their creativity and practice much needed educational concepts. There are hundreds of educational templates that are ready for your students to use within the program. You can also create your own activities for students to complete within Pixie.

RESOURCES
TRADING POST. This Tech4Learning website is a place where educators can upload their Pixie templates, activities, and lesson plans. They are there for you to download and use with your class! Sign up for free.

Tech4Learning’s homepage is a great resource for tutorials, tips, and support for any of their programs: Pixie, Web Blender, and Image Blender.

Recipes4Success is a great website that provides tutorials on this program and all Tech4Learning programs.

BEST FEATURES ABOUT PIXIE:

  1. Print multiple pictures: If you choose to print multiple paintings at one time, you can print as “trading cards” and trade your pictures with your friends. Think of classroom implications: if each child trades a different historical or literary figure, they can learn from each other’s cards. You can also print mini booklets, comic strips, and table tents.
  2. Share your pictures: Choose to play your pictures in slideshow format directly from Pixie. Add music, transitions, and have it run continuously. In addition, you can export your slideshow as a Quicktime video, a web page, or a full presentation.
  3. Export your pictures: Export Pixie paintings as common picture formats such as JPS or GIF. Now you can import them into Microsoft Office, Photo Story, Movie Maker, etc. This also means you do not need to have Pixie on your computer to view your pictures.

Language Arts Ideas

  • Create an ABC book. Give each student a different letter to stamp out with stickers or draw with the tools.
  • Create a noun sort by person, place and thing.
  • Sort words by consonant sound or vowel sound
  • Complete a Making Words activity using the letter stickers.
  • Create writing prompts for kids: Seasons, My Favorite Animal, My Hero, etc.
  • Graphic Organizers: Venn Diagrams, Story Maps, KWL, etc.
  • Sort words by syllables
  • Type and illustrate a poem
  • Create trading cards of literary figuresSort between real and fictional characters

Math Ideas

  • Import real pictures. Draw and label angles that you find.
  • Use the coins to show different ways to make the same amount of money.
  • Stamp out number sentences to illustrate them.
  • Symmetry with the mirror tool.
  • Expanded form


Science Ideas

  • Illustrate Life Cycles
  • Sort by Living and Non-Living
  • Illustrate the Water Cycle or the Rock Cycle
  • Illustrate weather for the week
  • Sort objects by sink or float
  • Label parts of an insect, parts of a flower, layers of the earth, planets in the solar system, layers of the rainforest, etc.
  • Food Chains and Food Webs
  • Food Pyraminds
  • Differences between whales and fish
  • Differences between the different types of rock
  • Create trading cards of different rocks, minerals, or elements

Social Studies Ideas

  • “If I were president” writing prompt
  • Label a map of the US by the intials of each state
  • Compare presidents or any 2 historical figures
  • Add a state stamp and fill it with stamps that represent resources available from that state
  • Color the regions of MDSort by community helpers
  • Sort by human, natural, and capital resources
  • Create trading cards of historical figures or current political figures
  • Create a postcard from a historical landmark or location

Art Ideas

  • Design a kite
  • Design a Christmas ornament
  • Paint a self-portrait
  • Label a color wheel
  • Paint anything!

Related Posts:

Recording Sounds in Pixie

Opening a Folder of Pictures in Pixie

Exporting a Painting as a .jpeg in Pixie

Classroom Ideas for Pixie

Find Sound Effects with “Find Sounds” Search Engine


Okay, are you a teacher looking for sound effects to use in multimedia projects for your students but are not sure where to look? The “Find Sounds” search engine will make your life so much easier. This site offers many different types of audio clips for you to download. The only problem is that the sound effect that you find may not be copyright-free.
Here is a disclaimer from the Find Sounds site:

“When you perform a search using FindSounds.com or the WebPalette feature of FindSounds Palette, you obtain links to audio files hosted by Web sites throughout the world. The sounds in these audio files may be copyrighted and their use governed by national and international copyright laws. We do not offer advice on the fair use of these files.”

Therefore, teachers and students still need to do some basic research to find out if the sound can be used under fair use laws, but at least they have a starting point now. Even so, check out Find Sounds and let me know what you think.

Sunday, December 28, 2008

Kitzu offers multimedia options for teachers and students


Kitzu is my newest find! I mentioned it briefly in an earlier post, but I finally had a chance to look at it this weekend. Kitzu offers free, copyright-friendly, and educational media packages for teachers and students to use in multimedia projects. Most packages include about six pieces of media around an educational theme from the 21st century that can include images, documents, audio clips, video clips, and illustrations. As a teacher, download one of these kits to use with your whole class. You will be amazed that each student uses the media differently to create a unique project. For teachers who do not know where to start, Kitzu is the perfect first step for integrating with PowerPoint, Photo Story, Movie Maker, or Adobe Premier Elements.

MD, VA, DC Day of Discovery

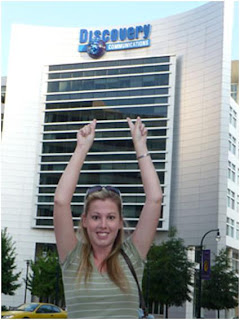
On Wednesday, August 13, 2008 I traveled to Silver Spring, MD for “The Day of Discovery” at the Discovery Communications Headquarters. In addition to breakfast, lunch, and wonderful door prizes, we were treated to two keynote sessions and three break out sessions that taught us how to incorporate “Discovery Streaming,” a paid subscription to a site that is packed with educational multimedia for teachers to use.

Scott Kinney presented on “The Media Evolution”. He supported the idea that media should be incorportated into the classroom as an instructional aid since 8-18 year old children spend 6 1/2 hours a day with media of some kind. Many teachers do not realize all of the skills that are needed to create media for school projects: researching, locate and gather resources, prewriting, writing, editing, storyboarding, and reading fluency skills.

Hall Davidson, Director of the Discovery Educator Network, presented on “Digital Media with Students in the Classroom.” He discussed scaffolding the use of digital media in student projects until students are comfortable with the skills. For example,
  1. Begin with creating PowerPoint presentations and embed videos from Discovery Streaming.
  2. Create slideshows from your digital images in Photo Story.
  3. Create videos and movies with narration in Movie Maker.
  4. Finally, create movies in Adobe Premier Elements and introduce chromakey skills to the kids.

In addition, Mr. Davidson told us about Kitzu, a website of resources for digital media for student projects and Jakesonline, a site of wonderful tutorials to get you started.

Matt Monjan presented “50 Ways to Integrate DE Streaming”. While most of this was a review since I saw matt speak a few times before, I still learned a few new tricks. For example, I discovered that you can now insert embeddable code, or widgets, into DS’s writing prompts and you can add more than one image. Also, if you search “AFI” in Discovery Streaming, you will find several film making video resources to use with your students.


Hall Davidson also presented on “Teaching with Cell Phones”. I spent most of the time on my phone so I forgot to write most of it down. However, I learned that you can podcast directly from your cellphone using Gcast.com. You can also upload video directly into YouTube from your cell phone. And did you know that you can take a poll from your phone using text massaging and see the results live on polleverywhere.com? I tried this out - SO COOL. Or try this one - if you send a text message that includes a fast food restaurant and a menu item to 34381 you will receive a message with all of the nutritional information about that food item. For example, text “McDonald’s Big Mac” to 34381, it will tell you how many grams of fat you are about to enjoy.
Dennis Swain presented “Embedding Multimedia: PowerPoint Presentations that Pop!” While I knew that we could embed videos and hyperlink to videos, I didn’t realize you could embed videos and still have all of the controls of Windows Media Player available (play, rewind, fast forward, etc). To do this, open PowerPoint and go to a slide.

  1. Click the “View” button on the top toolbar.
  2. Click “Toobars” and “Control Tool Box”.
  3. Click on the “hammer” button.
  4. Scroll to “Windows Media Player” and select it.
  5. Crosshairs will appear. Draw a box on the slide where you want the video to appear.
  6. Right-click the box. Choose “properties”.
  7. Click on the three dots on the box. (…)
  8. Browse to where your downloaded movie is on your computer. Select it.
  9. Under “playback options”, uncheck “auto start” and check “stretch to fit.”
  10. Click OK.
  11. Now you will see the embedded video with the Media Player controls. While the video is playing, you can right-click the video and choose “Zoom” and “Full screen”. Ta-Dah!


Thank you, Discovery Education!

RELATED POST:

Photostory Quick Tip: Saving as a Project vs. Saving as Final Movie

Saturday, December 13, 2008

Make a wild animal!


Another great site is Switch Zoo. This site used to be entirely free, but over the last year or so they started packaging the “game” for sale on CD. I have to admit, this is one of my biggest pet peeves as a teacher. You find a great, free site to use with your class, and as soon as you make it part of your routine, the site becomes a paid site. Anyway, some features of this site are still free (just enough to hook you). I had my class create a new animal, print it out in color, and then build a habitat out of clay to match their new animal. Have your class:

  1. Create a name for the new animal
  2. Create a habitat
  3. Explain how the animal adapts to survive in the habitat
  4. Explain what the animal eats, how it gets food, and how it protects itself.
  5. Write a creative story about the new animal: “My New Pet”, “A Strange Day at the Zoo”

Build Your Wild Self: Make yourself into a wild animal!


Okay - I know I feature a lot of websites, but maybe it’s because I know how hard it is to get software approved for classroom use in the schools today. I came across this website called “Build Your Wild Self” put out by New York Zoos and Aquariums. The site starts you will a human boy or girl template, and allows you to change different parts of your body to animal parts. Why would you want to do this? Besides being fun for children and adults, teachers can incorporate this into their classroom for creative writing or science. Just think: Let students create themselves as an animal, print it out, and then write about it. Students can explain how their new animal body parts allow them to survive in the chosen habitat. Or how about different writing topics to go along with this such as:


Explain how your life would be different if you came home from school looking like this.
What sports or activities would you be good at now that you are part animal?


Research the different animals that you picked and why you would want to be like that animal.

Wednesday, December 10, 2008

Digital Storytelling with Microsoft Photo Story 3


Digital storytelling is a powerful tool to motivate reluctant writers in the classroom. Microsoft Photo Story 3 is a free download that works on Windows XP and Windows Vista and is incredibly easy to use.

How can you use Photo Story to motivate writing in the classroom? Try these ideas:

1. Write about a field trip using your digital pics from your destination
2. Act out reader’s theater scripts or stories, take pictures, and have children write about the plot, conflict, solution, setting, or theme
3. Visually show your classroom routine using Photo Story
4. Visually emphasize new vocabulary
5. Narrate the steps to a science project or math investigation

There is a visual tutorial of Photo Story for those who like to see what they are downloading before they commit to it. I recommend it if you are one who doesn’t like to “play” around on software in order to figure it out.

Basically, there are 6 steps to creating a photo story.

  1. Open Photo Story and import your pictures using the icon. Select multiple pictures in your folder by using the “shift” or “control” button. Click “upload”.

  2. You’ll see all of your uploaded photos on a filmstrip bar at the bottom of the screen. Click and drag them to change their order in the story. Click “next”.

  3. Add text to the pictures by clicking on an individual picture and adding text in the caption box. By clicking on the “effect” button under the individual photo, you can add and effect such as “black and white”. Click “next”.

  4. Add narration to your story. Using a microphone, click “record” and speak your narration for each slide. When you are done with each slide, click onto the next one and continue speaking. Photo Story will automatically add timings to your photos based on how long you talk. Clicking the “Customize Motion” button under each photo will allow you to choose transitions between photos.

  5. Add background music. Choose your own music from your files or use music provided to you from the software.

  6. Save your story.


That’s it! By including a group of photos in a file folder on a shared drive in your school, you can have students access photos easily to create digital storytelling projects. Try and let me know what you think!